
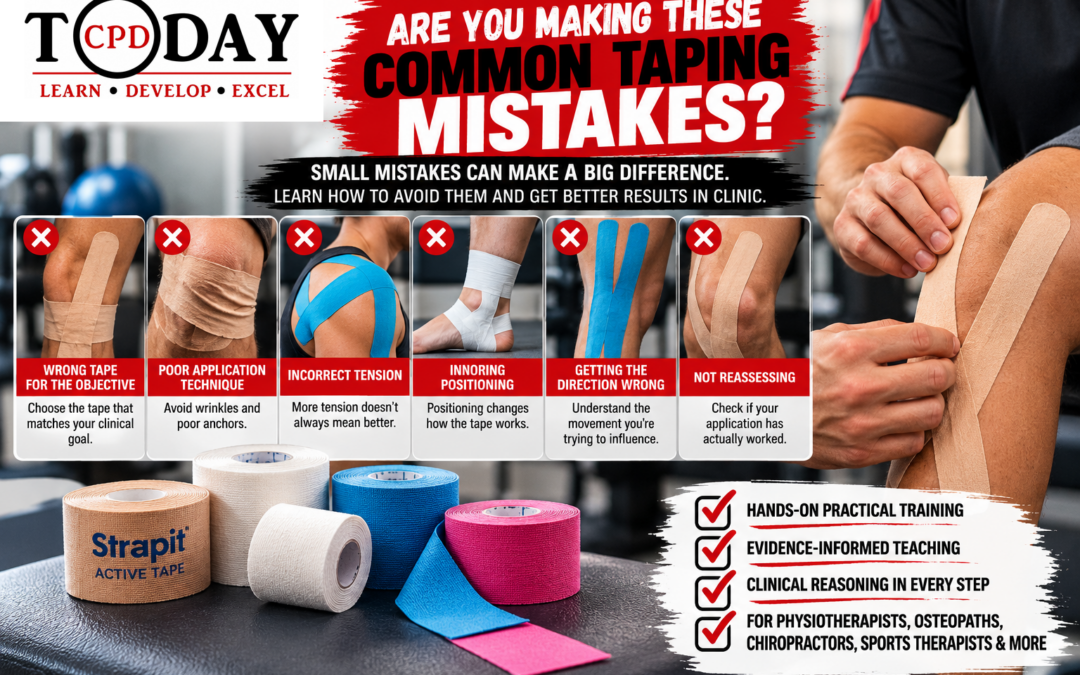
Common Strapping & Taping Mistakes Clinicians Make – and How to Avoid Them
Why Good Clinical Taping Requires More Than Knowing Where to Put the Tape
Clinical taping can look deceptively simple.
Watch a video, cut a piece of tape, copy the application and stick it onto the patient.
But effective taping requires considerably more thought.
Whether you’re using rigid sports tape, kinesiology tape or biomechanical tape, the effectiveness of an application depends on factors including assessment, tape selection, patient positioning, direction, tension, skin preparation and—most importantly—clinical reasoning.
A perfectly neat application can still be the wrong application.
At CPD Today, this is why our Clinical Strapping & Taping Course doesn’t simply teach clinicians a collection of taping recipes.
We teach you to understand:
What are you trying to achieve?
Which tape should you choose?
How should you apply it?
And did it actually work?
Here are some of the most common mistakes clinicians make when learning clinical taping.
Mistake 1: Choosing the Tape Before Identifying the Objective
This is probably the biggest mistake.
A clinician decides:
“I’m going to kinesiology tape this knee.”
But why?
Before choosing the tape, determine the clinical objective.
Are you trying to:
- Restrict unwanted movement?
- Provide additional support?
- Modify symptoms?
- Provide sensory input?
- Assist movement?
- Modify mechanical load?
- Improve tolerance of rehabilitation?
Your answer should influence your tape selection.
A useful framework is:
Patient → Assessment → Objective → Tape
Not:
Favourite tape → Patient
Mistake 2: Using the Same Tape for Everything
If the only taping system you’ve learned is kinesiology tape, almost every patient becomes a candidate for kinesiology tape.
The same applies to rigid taping.
But different tapes have different physical properties.
Rigid Sports Tape
Useful when the objective involves:
Support • Protection • Stability • Movement control
Kinesiology Tape
May be considered when the objective involves:
Sensory input • Pain modulation • Movement awareness • Supporting rehabilitation
Biomechanical Tape
Including Dynamic Tape® and Strapit Active Tape, when the objective involves:
Load modification • Movement assistance • Elastic recoil
Knowing several systems gives clinicians more options.
Mistake 3: Learning Recipes Instead of Principles
Search online for almost any condition and you’ll find a taping video:
“Taping for tennis elbow.”
“Taping for Achilles tendinopathy.”
“Taping for knee pain.”
The problem is that patients aren’t recipes.
Two people with exactly the same diagnosis can have completely different:
- Symptoms
- Functional limitations
- Sporting demands
- Tissue capacity
- Movement strategies
- Rehabilitation goals
Therefore, they may require completely different taping applications—or no tape at all.
Instead of asking:
“What’s the taping technique for this diagnosis?”
ask:
“What am I trying to influence in this patient?”
That single change dramatically improves clinical reasoning.
Mistake 4: Assuming More Tension Means Better Taping
A common beginner mistake is pulling the tape harder because it feels as though more tension must create a greater therapeutic effect.
It doesn’t necessarily.
Excessive tension can:
- Irritate the skin
- Cause discomfort
- Affect adherence
- Alter the intended mechanical effect
- Cause the tape to lift prematurely
Different taping systems also require different approaches to tension.
This is particularly important when moving between kinesiology and biomechanical tapes.
Understanding the properties of the material you’re using is essential.
Mistake 5: Ignoring Patient Positioning
Patient positioning isn’t simply about making the tape easier to apply.
It can fundamentally influence how an application behaves when the patient subsequently moves.
Consider a biomechanical application.
The position of the limb when the tape is applied can affect:
- How much the tape stretches during movement
- When elastic resistance develops
- Direction of recoil
- Mechanical assistance
- Patient comfort
Small changes in position can create significant changes in an application.
This is difficult to appreciate from photographs alone.
It’s something clinicians understand much more easily when they practise hands-on.
Mistake 6: Getting the Direction Wrong
Direction matters.
This is particularly relevant with biomechanical taping.
If your objective is to use an elastic tape to assist a particular movement, you need to understand the movement you’re trying to influence and how the tape will behave during that movement.
Simply placing tape over the painful structure isn’t necessarily enough.
Ask:
Which movement am I trying to influence?
In which direction should the tape generate assistance?
What happens to the tape when the patient moves?
Biomechanical taping requires clinicians to think in terms of forces and movement, not simply anatomy.
Mistake 7: Confusing Kinesiology and Biomechanical Tape
Both stretch.
That doesn’t mean they’re the same.
Kinesiology taping is commonly used where objectives include sensory input, symptom modulation and movement awareness.
Biomechanical taping focuses more specifically on mechanical interaction with movement.
Highly elastic biomechanical tapes such as Dynamic Tape® and Strapit Active Tape can be applied to help modify mechanical demand and assist movement.
Understanding the distinction helps clinicians choose the tape according to the intended effect rather than simply because both products are elastic.
Mistake 8: Poor Skin Preparation
Even the best application is useless if it falls off shortly afterwards.
Before taping, consider:
- Skin cleanliness
- Oils and moisturisers
- Excessive perspiration
- Hair
- Previous skin reactions
- Wounds or damaged skin
The skin should generally be clean and dry before application.
Clinicians should also be aware of potential adhesive sensitivity and provide appropriate advice about removing the tape if irritation develops.
Good taping starts before you open the roll.
Mistake 9: Creating Wrinkles and Poor Anchors
Poor tape handling can result in:
- Wrinkles
- Folded edges
- Excessive tension at anchors
- Premature lifting
- Uncomfortable applications
These might seem like minor technical issues, but they can determine whether an application lasts minutes or days.
Practical skills such as:
Cutting → handling → anchoring → tension → smoothing
become much easier with supervised practice.
Mistake 10: Taping the Site of Pain Without Assessing the Patient
Pain location doesn’t necessarily identify what needs to be influenced.
For example, a runner may report pain around the knee.
Simply placing tape around the knee because “that’s where it hurts” doesn’t constitute a clinical assessment.
You may need to consider:
- Training load
- Strength
- Movement
- Functional tasks
- Tissue capacity
- Previous injury
- Sporting demands
- Rehabilitation stage
The tape should follow the assessment.
Not replace it.
Mistake 11: Not Reassessing After Applying the Tape
This is one of the easiest mistakes to correct.
Before applying tape, choose something meaningful to test.
For example:
- Squatting
- Heel raises
- Stairs
- Shoulder elevation
- Walking
- Running
- Jumping
- A sport-specific movement
Record symptoms or function.
Apply your tape.
Then repeat the test.
Assess → Apply → Reassess
Has something changed?
If the patient’s painful squat was 7/10 beforehand and remains 7/10 afterwards, you need to question whether the application has achieved its objective.
Don’t assume that because the tape looks impressive, it is doing something useful.
Mistake 12: Using Tape Instead of Rehabilitation
Tape can be useful.
But tape doesn’t replace physical capacity.
Long-term management of many MSK conditions may require:
- Progressive strengthening
- Appropriate loading
- Movement rehabilitation
- Education
- Conditioning
- Return-to-sport preparation
Tape should generally be considered an adjunct to active rehabilitation, not the rehabilitation itself.
A useful objective may be:
Use the tape to help the patient tolerate the activity required to become less reliant on the tape.
Mistake 13: Making Patients Dependent on Tape
This follows naturally from the previous point.
If patients begin believing:
“I can’t exercise unless I’m taped.”
we may unintentionally reinforce dependence.
Where appropriate, explain why you’re using the tape.
For example:
“We’re using this temporarily to help make this activity more comfortable while we progressively build your strength and capacity.”
This places the tape within the rehabilitation plan rather than presenting it as something the patient permanently needs.
Mistake 14: Assuming Tape Must Work Because the Patient Feels It
A patient feeling the tape doesn’t automatically demonstrate a meaningful clinical benefit.
This is another reason reassessment matters.
Ask whether there has been a relevant change in:
- Pain
- Movement
- Function
- Confidence
- Activity tolerance
Clinical taping should have an objective that can be reassessed.
Mistake 15: Copying Social Media Without Understanding Why
Social media can be useful for discovering techniques.
But a 30-second video rarely explains:
- Why that tape was selected
- The assessment findings
- Why that direction was chosen
- How much tension was used
- Patient positioning
- Contraindications
- How the patient responded
- Whether the application actually worked
Learning where to put tape is easy.
Understanding why is the skill.
Why Hands-On Taping Training Matters
You can learn the theory of taping online.
Developing practical skill is different.
During hands-on training you can:
- Feel different tape properties
- Practise tension
- Experiment with positioning
- Develop handling skills
- Apply different techniques
- Be taped yourself
- Compare applications
- Receive feedback
- Reassess functional movements
This practical experience can dramatically improve confidence.
Learn Rigid, Kinesiology and Biomechanical Taping Together
One of the key strengths of the CPD Today Clinical Strapping & Taping Course is that we don’t restrict clinicians to one system.
You’ll explore:
Rigid Sports Taping
For applications involving support, stability, protection and movement control.
Kinesiology Taping
For applications involving sensory input, pain modulation, movement awareness and rehabilitation.
Biomechanical Taping
Including Dynamic Tape® and Strapit Active Tape, with a focus on movement assistance and load modification.
Learning these approaches together allows you to compare their properties and understand when one approach might be more appropriate than another.
Clinical Reasoning Before Tape
Our approach can be summarised in five stages:
1. Assess
What is the patient’s problem?
2. Define
What exactly are you trying to change?
3. Select
Which tape has the appropriate properties?
4. Apply
Use appropriate positioning, direction and tension.
5. Reassess
Did you actually achieve the objective?
This is far more valuable than memorising dozens of applications.
Who Is the CPD Today Strapping & Taping Course For?
The course is designed for MSK and rehabilitation professionals, including:
- Physiotherapists
- Osteopaths
- Chiropractors
- Sports therapists
- Rehabilitation professionals
- Other appropriately qualified practitioners
It is suitable both for clinicians who are relatively new to taping and practitioners who already use tape but want to broaden their skills and improve their clinical reasoning.
What Will You Take Back to Clinic?
Our aim is for you to leave with more than a certificate.
You’ll develop practical experience in:
- Selecting appropriate tape
- Rigid sports strapping
- Kinesiology taping
- Biomechanical taping
- Dynamic Tape®
- Strapit Active Tape
- Patient positioning
- Tension and direction
- Clinical reasoning
- Functional reassessment
- Integrating taping with rehabilitation
Most importantly, you’ll understand why you’re applying the tape.
Frequently Asked Questions
What is the most common taping mistake?
One of the most important is choosing an application before identifying the clinical objective. Assessment should determine what you’re trying to change and therefore which tape may be appropriate.
How tight should clinical tape be?
There isn’t one correct amount of tension for every application. It depends on the tape, technique, patient and clinical objective. Excessive tension isn’t automatically better.
Should you reassess after taping?
Yes. Where possible, identify a relevant symptom, movement or functional task before taping and repeat it afterwards.
Is biomechanical tape the same as kinesiology tape?
No. Although both are elastic, they can be used with different clinical objectives. Biomechanical taping focuses particularly on mechanical load modification and movement assistance.
Are Dynamic Tape® and Strapit Active Tape both biomechanical tapes?
Yes. Both can be used within a biomechanical taping approach. The important skill is understanding the principles of load modification and movement assistance rather than treating each brand as a completely separate taping philosophy.
Can taping replace rehabilitation?
Generally, no. Taping is better considered an adjunct that may help selected patients participate in active rehabilitation.
Stop Memorising Taping Recipes. Start Understanding Taping.
Clinical taping becomes far more useful when you stop asking:
“Where do I put the tape?”
and start asking:
“What am I trying to achieve?”
The CPD Today Clinical Strapping & Taping Course combines hands-on practical training with evidence-informed clinical reasoning across:
**Rigid Sports Taping
- Kinesiology Taping
- Biomechanical Taping**
You’ll learn techniques, but you’ll also learn how to adapt those techniques to the individual patient in front of you.
Learn • Develop • Excel
The right tape.
For the right patient.
For the right reason.
Book your place on the CPD Today Clinical Strapping & Taping Course and develop practical taping skills you can use immediately in clinic.
SEO setup
SEO title: 15 Common Strapping & Taping Mistakes Clinicians Make
Meta description: Discover 15 common sports, kinesiology and biomechanical taping mistakes and learn how better assessment, tape selection and clinical reasoning can improve your taping.
Suggested URL: /common-strapping-taping-mistakes
Primary keyword: strapping and taping mistakes